
Friday, April 12, 2019

A Unique Greeting Card -- with Step-by-step Directions


Today's post brings out a greeting card made with scraps of stencil-printed papers -- 


Here's the technique used in printing the collage papers --

First, I created a glossy finish on my paper, by painting it with a generous coat of Golden Fluid Acrylic paint.  (Golden also makes a matte fluid acrylic paint, but that's not what I used, since I wanted a glossy surface on this substrate.)


After that glossy base-coat dried, I secured my 9" X 12" Trivet A9 stencil  to the substrate with masking tape:


I used opaque Cobalt Teal acrylic paint and a cosmetic sponge to stamp color thru the stencil's openings.

Having applied the teal paint, I lifted off the stencil.  Once the teal had dried, I brushed on a coat of transparent red acrylic paint.  


My next step -- while the red paint was still damp -- was to spritz water across the red paint. Then I blotted and gently rubbed the surface with dry paper towels.  This lifted the red paint in areas that left a mottled, spattered look.  Here is the final result:


Above:  I've left the bottom un-"spattered" to better show the before-and-after of this last step.

The stencil I've used is my 9" X 12" Trivet A9 , shown below --


Now, I want to show a different approach that I used to create a similar spattered look with a resist.  

But this time, the resist wasn't aqua acrylic paint.  Instead, I used VersaMark Watermark Stamp Pad (available online at JoAnn Fabric and Crafts as well as other vendors.) 

For a substrate, I chose glossy, sturdy cardstock.  A glossy surface is needed to get the best results with this technique. 

I opened the stamp pad, placed it wet-side-down onto the stencil, and pounced across the stencil's openings many times, to get an even coating of resist across the two openings that form bird shapes in my 6"X 6" stencil Osprey Wings.  See below:


Above:  The stencil is tinted blue to show up better in the photo.

After lifting off the stencil to give the resist some drying time, I went over the surface with red acrylic paint.  Then, with a paper towel, I blotted away some of the red paint -- while this paint was still damp.  Here is the print that resulted:


With the osprey, I like to think this spatter-like look creates an ethereal atmosphere that suits the subject.

Many thanks for visiting my blog today!  To scroll thru the pages of all my StencilGirl stencils and masks, please start here.

Tuesday, April 9, 2019

Botanical Stencils


Warm weather means that greens will be growing; flowers will be blooming.

Here indoors, botanicals are flourishing...


The above greeting card was made with my 6" x 6" stencil Ginkgo.


The envelope above was created to house the greeting card made with 
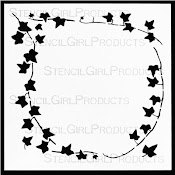
Ginkgo -- because the colors were the same. But the envelope's print was made with my 6" x 6" stencil Ivy Frame 6:  one in my series of 4 ivy stencils.  
The stretched canvas shown above with created with my 9" x 12" Longwood Florals Mask (left side and middle) and my 9" x 12" stencil It's a Jungle Out There (far right.)  You can click on the image to enlarge it and better see detail.

The 2-page art journal spread above was made by MaryBeth Shaw, using a variety of StencilGirl stencils.  On the right-side page, she used my 6" x 6" stencil Mikki's Flowers.  You can click on the above image to enlarge it and better see details.

The above print was created with my 6" x 6" stencil Silhouette of a Wildflower Bouquet, on an old encyclopedia page that was first tinted blue.  This print became the decoration on a giftbag.

The above greeting card was made with my 9" x 12" stencil Garden Montage.

Thank you for taking time to stop here today!  To scroll thru my pages of StencilGirl stencils and masks, please start here.


Saturday, April 6, 2019

Celebrating Other StencilGirl Designers!


Stitch a Doily, a 6" x 6" stencil by Maria McGuire, has long been one of my favorites.  In the past I've used the stencil in its entirety.  Recently I altered the stencil with scissors, cutting out the center (and saving it!)  Today's post starts with close-ups from a work-in-progress of mine.  First up:  Two images created with Stitch a Doily--


Second up:  Two images created with  Featuring Blueprints of Archeological Treasures Small Stencil, by Carolyn Dube, another 6" x 6" favorite of mine.  Part of it was used here --


And another part of Carolyn's stencil was used here --


Next up:  A mixed-media collage I've developed using a 9" x 12" mask by Valerie Sjodin, Spirit Wind -- and since I had been a fan following Valerie Sjodin online for years before she joined the StencilGirl team, I was especially delighted at the privilege to use a mask of her design:


Today's next-to-last art sample, below, was developed with Mary Beth Shaw's 6" x 6" Curves along with Undulating Line Waves, designed by Trish McKinney --


Bringing down the curtain for today's post is this piece on stretched canvas, created using Soulful Scribbles Flourishes by Tracy Bautista:


Thanks for visiting today!

Wednesday, April 3, 2019

ORNAMENTAL IRON CURLS 6" x 6" Stencil


In one of my acrylic paintings on stretched canvas, I repeatedly put to work my 6" x 6" stencil Ornamental Iron Curls, which looks like this --


Ornamental Iron Curls

Below:  A series of close-ups showing details.  Here the stencil was used in layer after layer, each time using a different color of acrylic paint....


(At the bottom of the area shown above, another 6" x 6" stencil was used -- MB Makes Marks Pipette by MaryBeth Shaw.)


The repeated application of the same stencil contributes toward unity across the entire piece.  (This piece is still in progress.)

Thank you for stopping by my blog today!  To scroll thru the pages of all my StencilGirl stencils and masks, please start here.

Sunday, March 31, 2019

9" x 12" Stencils VINTAGE SCRIPT and BRANCHING BLOSSOMS SILHOUETTE


My 9"x 12" Branching Blossoms Silhouette Stencil is often called "The Tree" because ... well, it looks like one!  I've even started to call it "The Pseudo-Tree" myself ...


Below, I'm posting the first in a series of close-up photos that show a work-in-progress on canvas.  (Note:  in the background and on the upper right are underlying prints made with the 9'x 12" stencil Letter Mania, designed by Suzi Dennis.)  Thruout all these phases, I'm working with acrylic paints.


Next phase ... adding green:


Next phase:  added a whole lot of green!--


Next phase ... Here is the entire canvas, showing that I've now toned down the green and used part of another 9"x 12" stencil, Vintage Script: 


By the time I had gone this far in the process, I was wishing I had left the left side in its original condition (as shown in the top photo close-up) but there was no going back.  All I could do was move forward and hope to make the best of things.  (Can anyone else relate to this??)

Much later, I finished the canvas with the prints shown in the close-ups below:


Detail 1


Detail 2


 Detail 3


Full view

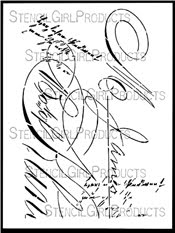
My 9" x 12" stencil Vintage Script looks like this --


Thanks for visiting!  To scroll thru the pages of all my StencilGirl stencils, please start here.  To subscribe to this blog by email, please use that option in the upper right sidebar.

Thursday, March 28, 2019

FERN Stencils


Fern Fronds Silhouette is a mini stencil -- 4" x 4" -- but sometimes, a mini is perfect for a project!  Notice below how a multi-colored old map brings excitement to a print made with this stencil and burnt-orange acrylic paint.


Like all other StencilGirl stencils and masks, Fern Fronds Silhouette volunteers to work in any direction...


... and works just as well with printmaking inks as it does with heavy-body acrylic paints: 


This 4" x 4" stencil itself looks like this --


 Fern Fronds Silhouette Mini (4"x 4")

I designed another fern stencil --


Ferns 6 Stencil (6" x 6")

-- and today's post has two art samples I've created with it:


 Ferns 6 Stencil (6" x 6") and Prayer Flags Stencil (9" x 12") 


Ferns 6 Stencil (6" x 6") and Sprigs Stencil (6" x 6")

 Sprigs Stencil (A.K.A "the angel stencil" -- can you find the hidden angel? -- looks like this:


Sprigs Stencil (6" x 6")

And the Prayer Flags stencil looks like this --


Prayer Flags stencil (9" x 12")

Lots of thanks for stopping by my blog today!  To scroll thru the pages of my StencilGirl stencils and masks, please start here.